Redmi 6 – App Updates

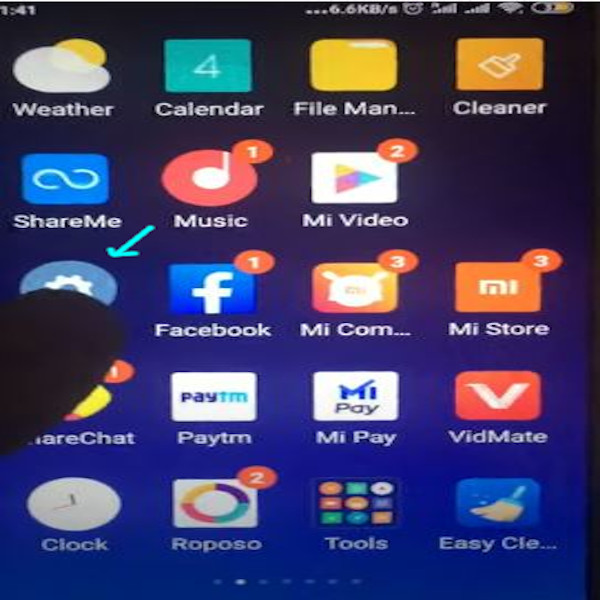
  1. Navigate to home screen on Redmi 6. Access settings on this screen.
Redmi 6 Home Screen

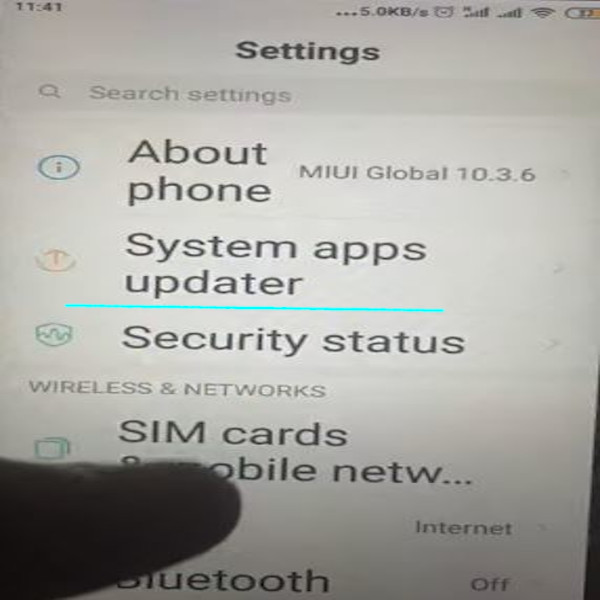
2. Access Systems App updater option on this screen.

Redmi 6 – Settings

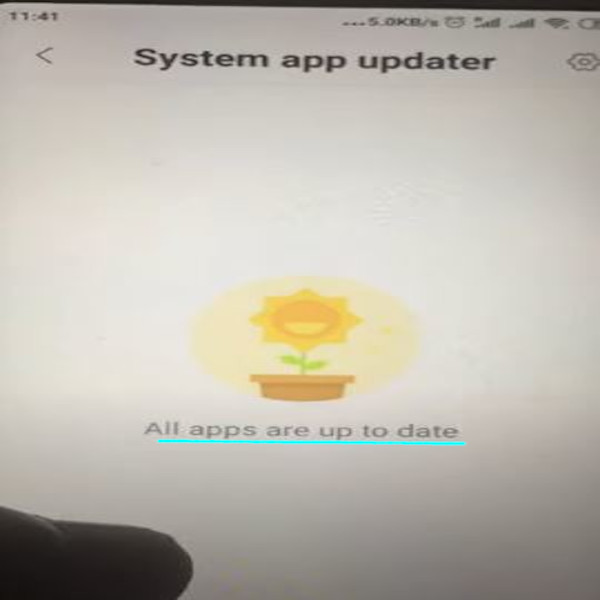
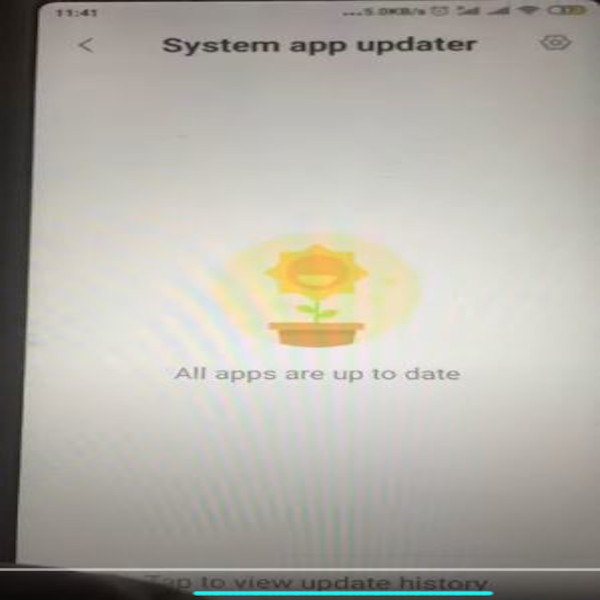
3. Check App update status on this screen.

App Update Status

4. Tap to view/check app update history on this screen.

Redmi 6 – Systems App Updater

5. Verify app update history on this screen.

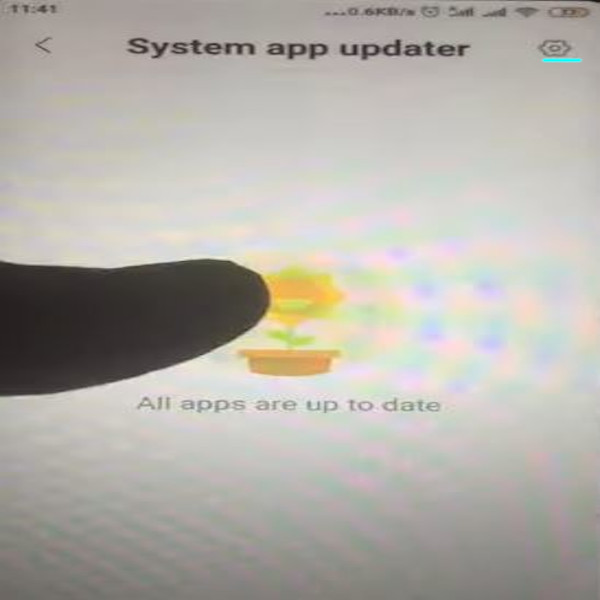
6. Navigate to System app updater settings on this screen.

Redmi 6 – Systems App Updater Settings

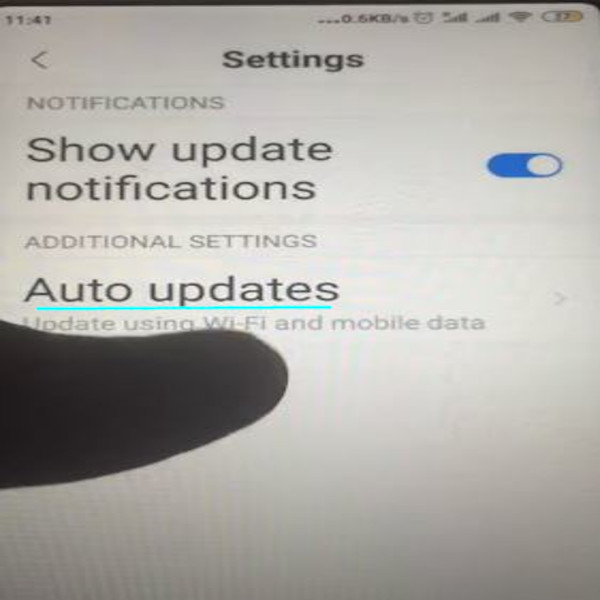
7. Turn update notifications ON/OFF.

Redmi 6 – Update Notifications

8. Access auto updates under additional settings on this screen.

Redmi 6 – Settings

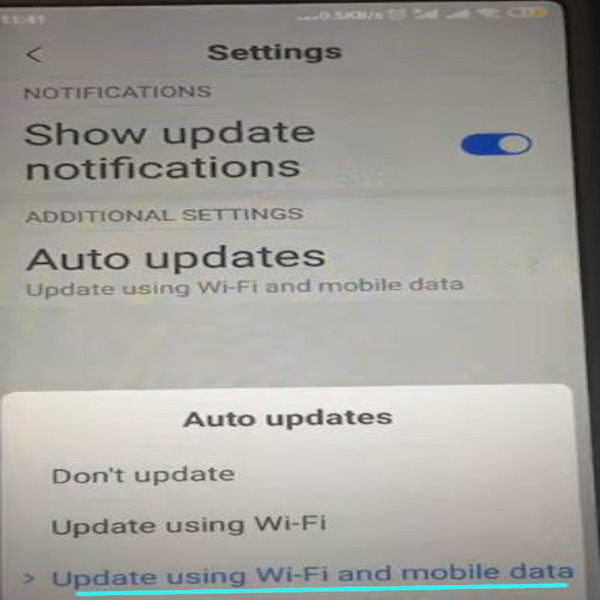
9. One may choose between “Don’t Update“, “Update using Wi-Fi” and “Update using Wi-Fi and Mobile Data” on this screen.

Redmi 6 – Auto Updates

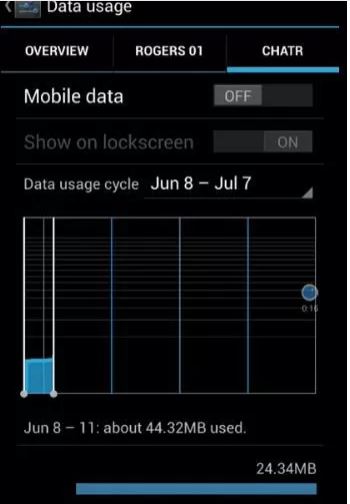
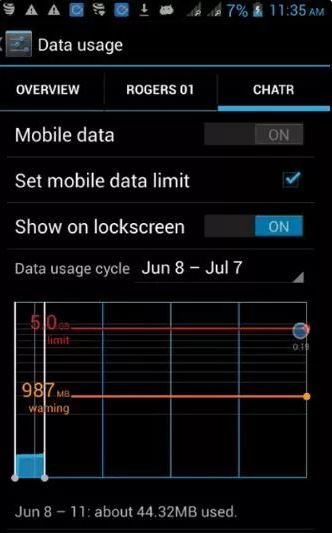
10. Check app data usage to verify updates.

Advertisement

How to Set Up Data Settings on Android

  1. Access your phone settings for Android.

Step 1

2. Make sure WIFI setting is turned off.

Step 2

Step 3

3. Make sure your mobile data is turned on under data usage.

Step 4

4. Access Mobile Network settings on the same screen. On some Androids, you might see an option for cellular networks.

Mobile Network Settings

5. Under Mobile Network Settings, click on Access point Names.

Data 2

6. Create a new Access Point Name under mobile networks. Type in a name for your access point name. Your name may be “something you may remember in the future”.

Step 7

7. Type in your APN for your new Access Point Name. Contact your service provider if you don’t know your APN.

Step 8

8. Set up an APN type. For data, you may select your apn type as default.

Step 9

9. Save your new APN.

Step 10

10. Check for data symbol beside your signal bar. If you see a 3G, H+ or 4G symbol, you should be able to access your data. You may proceed to test your data speed at this point.

Step 14